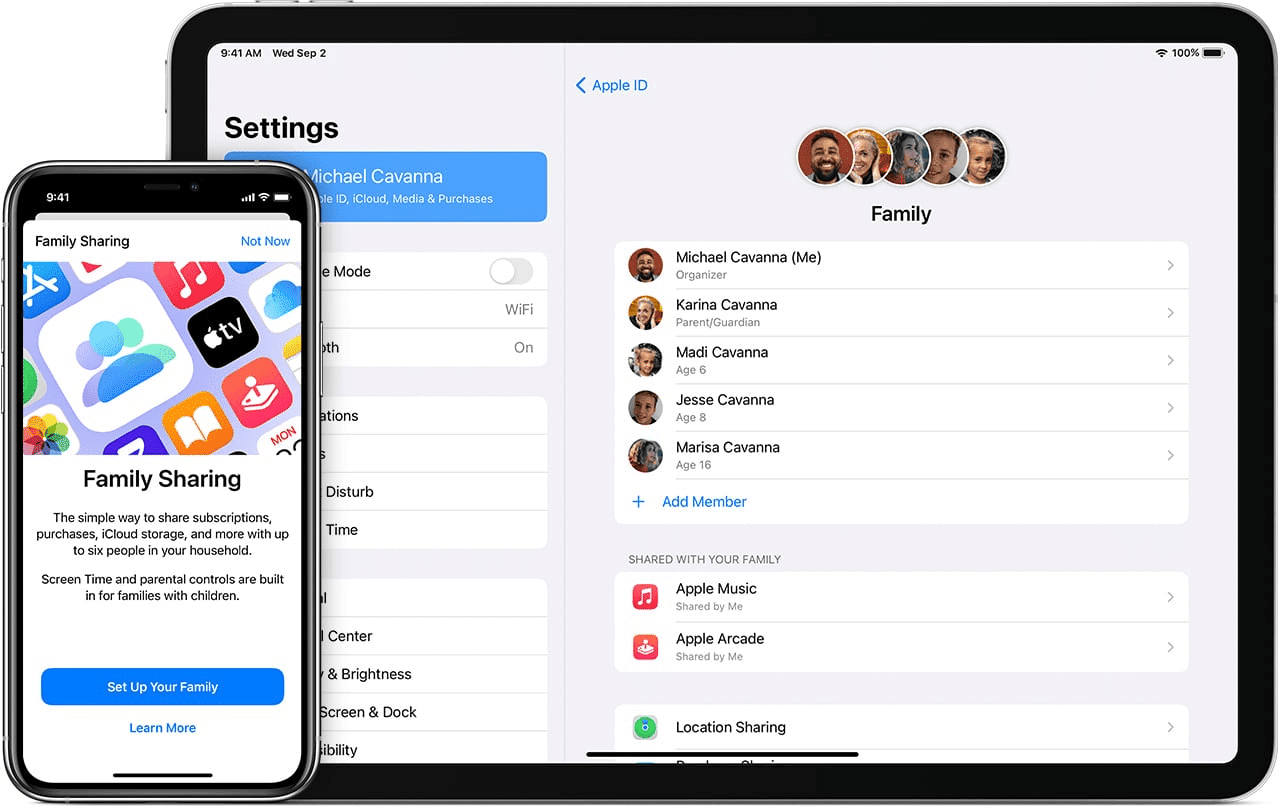
Family Sharing enables families to share apps, music, movies, books, and subscriptions like Apple Music, Apple TV+, and iCloud+ at no extra cost. According to Apple, each member uses their own Apple Account, keeping preferences and data private while accessing shared content. For example, an app purchased by one family member becomes available to all, appearing on the Purchased page in the App Store. This is especially useful for families with multiple iPads, as it reduces duplicate purchases and simplifies access to shared tools and entertainment.
The feature also includes parental controls like Ask to Buy, which lets parents approve or deny children’s downloads, ensuring age-appropriate content. With iPadOS 18 or later, setting up Family Sharing is straightforward and enhances household coordination through shared calendars, photo albums, and even device location tracking via Find My.
Step-by-Step Setup Guide
Setting up Family Sharing on your iPad is quick and requires just one device to get started. Here’s how to do it, based on Apple’s official instructions:
-
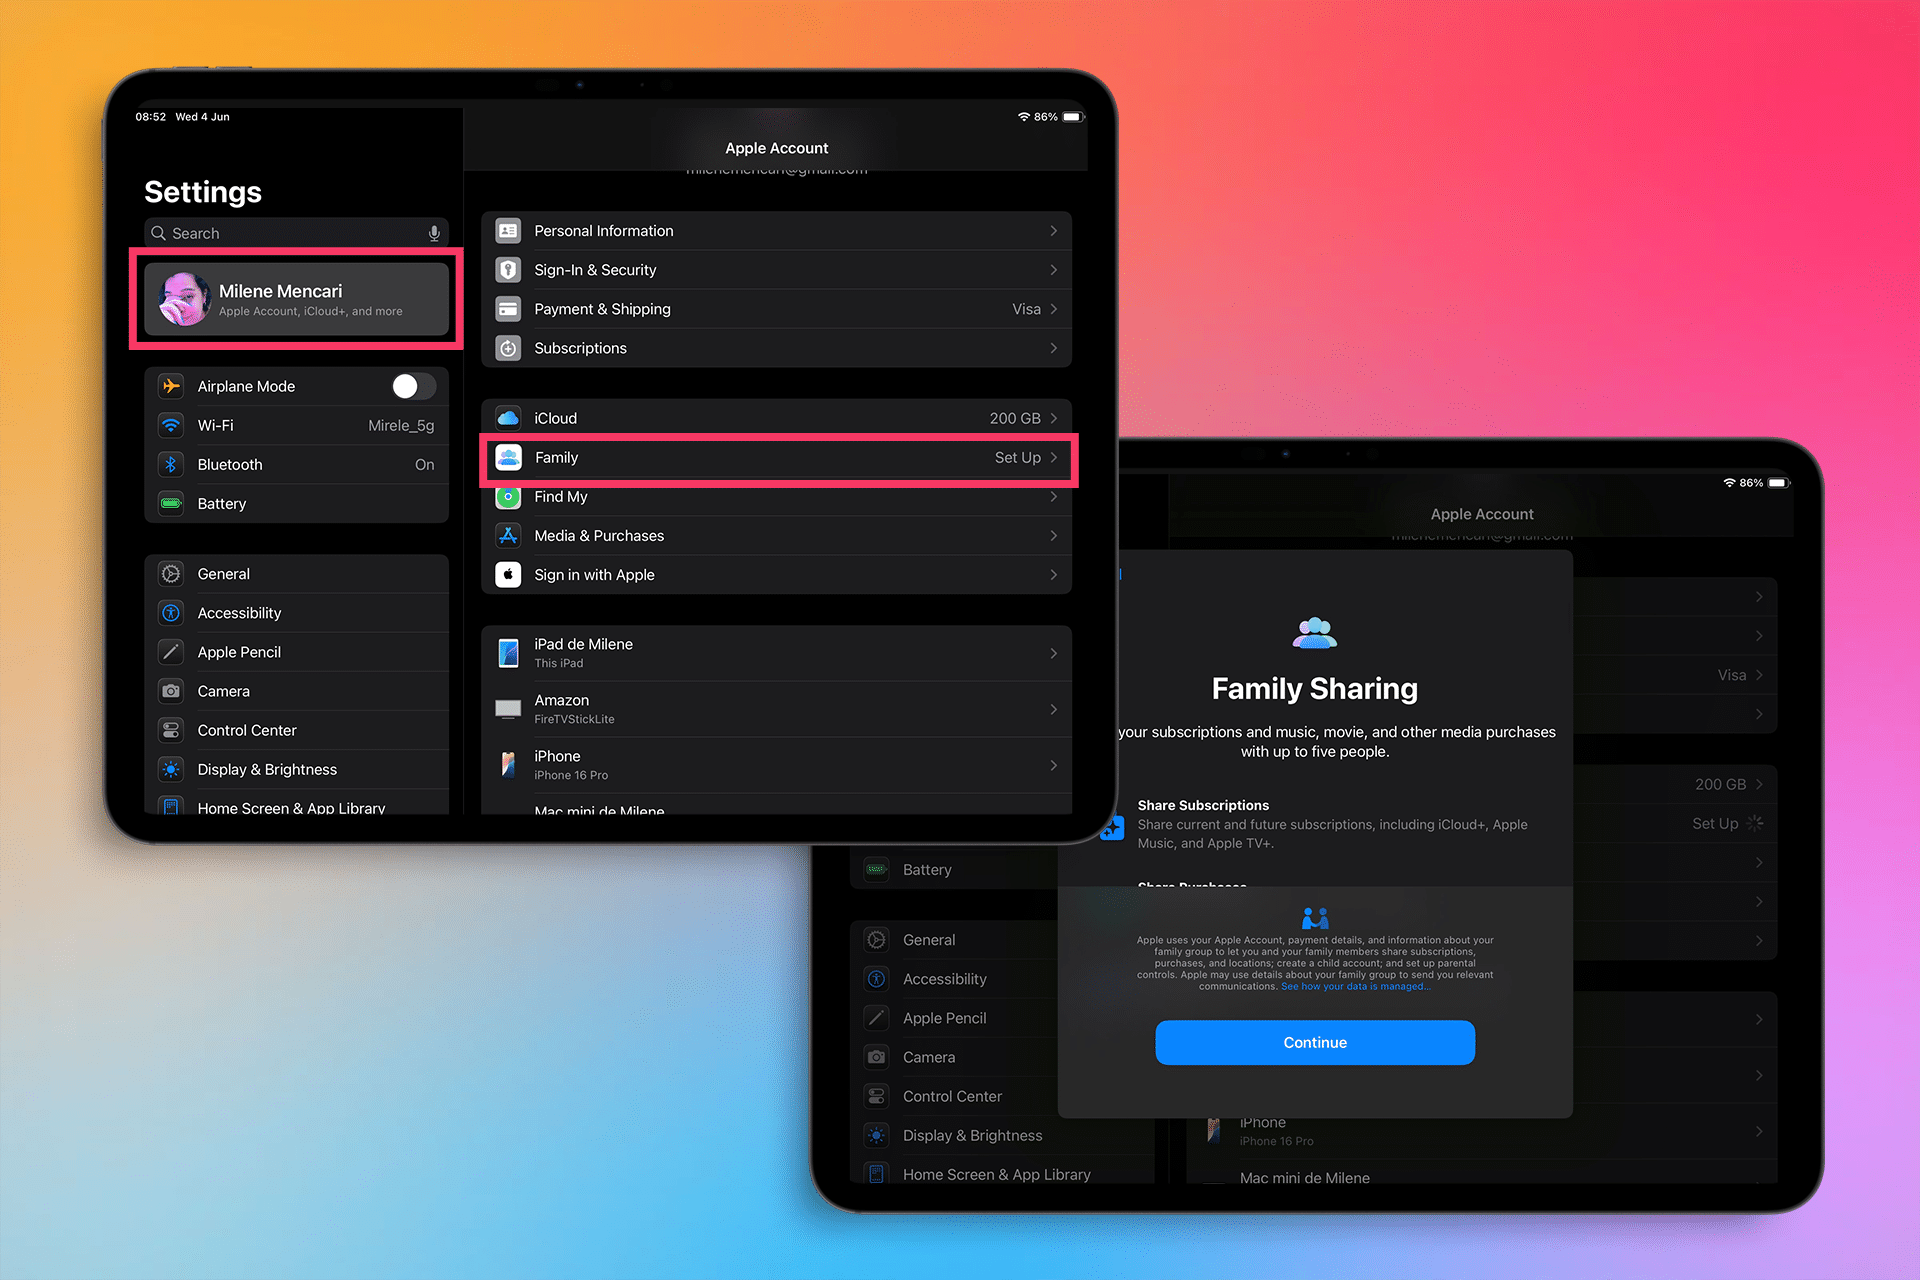
Open Settings: On your iPad running iPadOS 18 or later, tap the Settings app, then tap your name at the top to access your Apple Account settings.
-
Start Family Sharing: Tap “Family” (or “Family Sharing” if you don’t see “Family”). Select “Set Up Your Family” and tap “Continue” to begin.
-
Invite Family Members: You can invite up to five others with Apple Accounts. Tap “Invite Others” to send invitations via Messages, Mail, or AirDrop. For nearby family, use “Invite in Person” to enter their Apple Account password directly on your iPad. If suggested family members appear, tap “Invite” next to their names.
-
Create a Child Account (Optional): For kids under 13, tap “Create Child Account.” Enter their birthday, agree to the Parent Privacy Disclosure, and create an Apple Account (e.g., [email protected]). Set up security questions and enable Ask to Buy to approve their purchases.
-
Enable Purchase Sharing: To share apps, tap “Purchase Sharing” in the Family settings, then tap “Continue.” Confirm the payment method (the family organizer’s default card will be billed for purchases). Each member must go to Settings > Family > Purchase Sharing and turn on “Share My Purchases” to access shared apps.
-
Customize Features: Choose which services to share, such as App Store purchases, iCloud+ storage, or subscriptions like Apple Arcade. For subscriptions, go to Settings > Family > Subscriptions > Manage Subscriptions, select a subscription, and turn on “Share with Family.”
-
Accept Invitations: Family members receive invitations via email or text. They can accept by following the onscreen instructions or going to Settings > [their name] > Invitations. Once accepted, Family Sharing activates across all their devices signed into the same Apple Account.
After setup, shared apps appear on the Purchased page in the App Store. To download a family member’s app, open the App Store, tap your profile, select “Purchased,” choose a family member’s name under “Family Purchases,” and tap the cloud icon next to the app.
Enhancing the Experience
Family Sharing goes beyond apps. You can share iCloud Drive folders for family documents, set up shared photo albums, or enable Location Sharing via Find My to track devices. For parents, Screen Time lets you monitor kids’ app usage and set limits, while Ask to Buy ensures control over downloads. For example, when a child requests an app, the organizer gets a notification to approve or decline it directly from their iPad.
To share subscriptions like Apple Music or Apple Arcade, ensure the subscription is eligible (some App Store subscriptions may not support sharing). Go to Settings > Family > Subscriptions, select the subscription, and enable “Share with Family.” If you have an iCloud+ plan (200GB or higher), you can share storage without exposing personal files, as each member’s data remains private.
Practical Tips and Considerations
-
Payment Responsibilities: The family organizer’s payment method covers shared purchases. Verify the card in Settings > Family > Purchase Sharing to avoid issues. If a family member’s Apple Account balance is insufficient, the organizer’s card is charged.
-
Device Compatibility: Family Sharing requires iPadOS 8 or later. Check your iPad’s software version in Settings > General > Software Update to ensure compatibility.
-
Child Accounts: Kids under 13 need a parent-created Apple Account. Use Quick Start on iPadOS 16 or later to set up a child’s device with automatic parental controls.
-
Limitations: Not all apps are shareable (e.g., in-app purchases may not be visible). All members must use the same Apple ID country or region. You can only join one family group at a time and switch groups once per year.
Recent posts on X highlight Family Sharing’s appeal for cost-saving, with users appreciating the ability to share apps like Procreate or games without repurchasing. Some note occasional hiccups, like delayed app visibility, which can often be resolved by refreshing the Purchased page or signing out and back into the App Store.
Why It Matters
Family Sharing simplifies managing digital content for households, saving money and enhancing coordination. For instance, a family of four can share a $14.99/month Apple Music Family plan instead of paying $9.99/month per person, cutting costs significantly. It also empowers parents to guide kids’ digital experiences while keeping data private. As Apple continues to integrate features like Apple Intelligence into iPadOS, Family Sharing ensures everyone in the household can access cutting-edge tools without extra expense.
By setting up Family Sharing, you’re not just sharing apps—you’re creating a connected, efficient ecosystem for your family’s Apple devices. Whether it’s downloading a shared game or managing kids’ screen time, this feature makes your iPad a hub for family collaboration.