
Your iPhone does more than take photos — it is a powerful video camera capable of capturing broadcast-quality footage in many situations. From quick clips to cinematic moments, the tools built into iOS 26 help you capture smooth motion, rich color, and sharp detail without needing extra gear. This guide walks through practical shooting scenarios, key controls, and easy tutorials that help you make better videos every time you press record.
Modern iPhones automatically optimize exposure, color, and focus, but understanding how and when to take manual control makes all the difference. Whether you are filming family moments, short films, action sequences, or creative projects, knowing your tools helps bring your ideas to life.
Choosing the Right Video Mode
Your iPhone offers multiple video modes tailored to different styles of shooting:
• Video – Standard video capture with automatic exposure and stabilization.
• Cinematic Mode – Adds depth-of-field effects and automatic focus transitions.
• Slo-Mo – Slow motion for dramatic, smooth action.
• Time-Lapse – Compresses long events into short, engaging clips.
Open the Camera app and swipe to choose a mode. Each mode adapts to light and movement differently, so explore them to find the best fit for your scene.
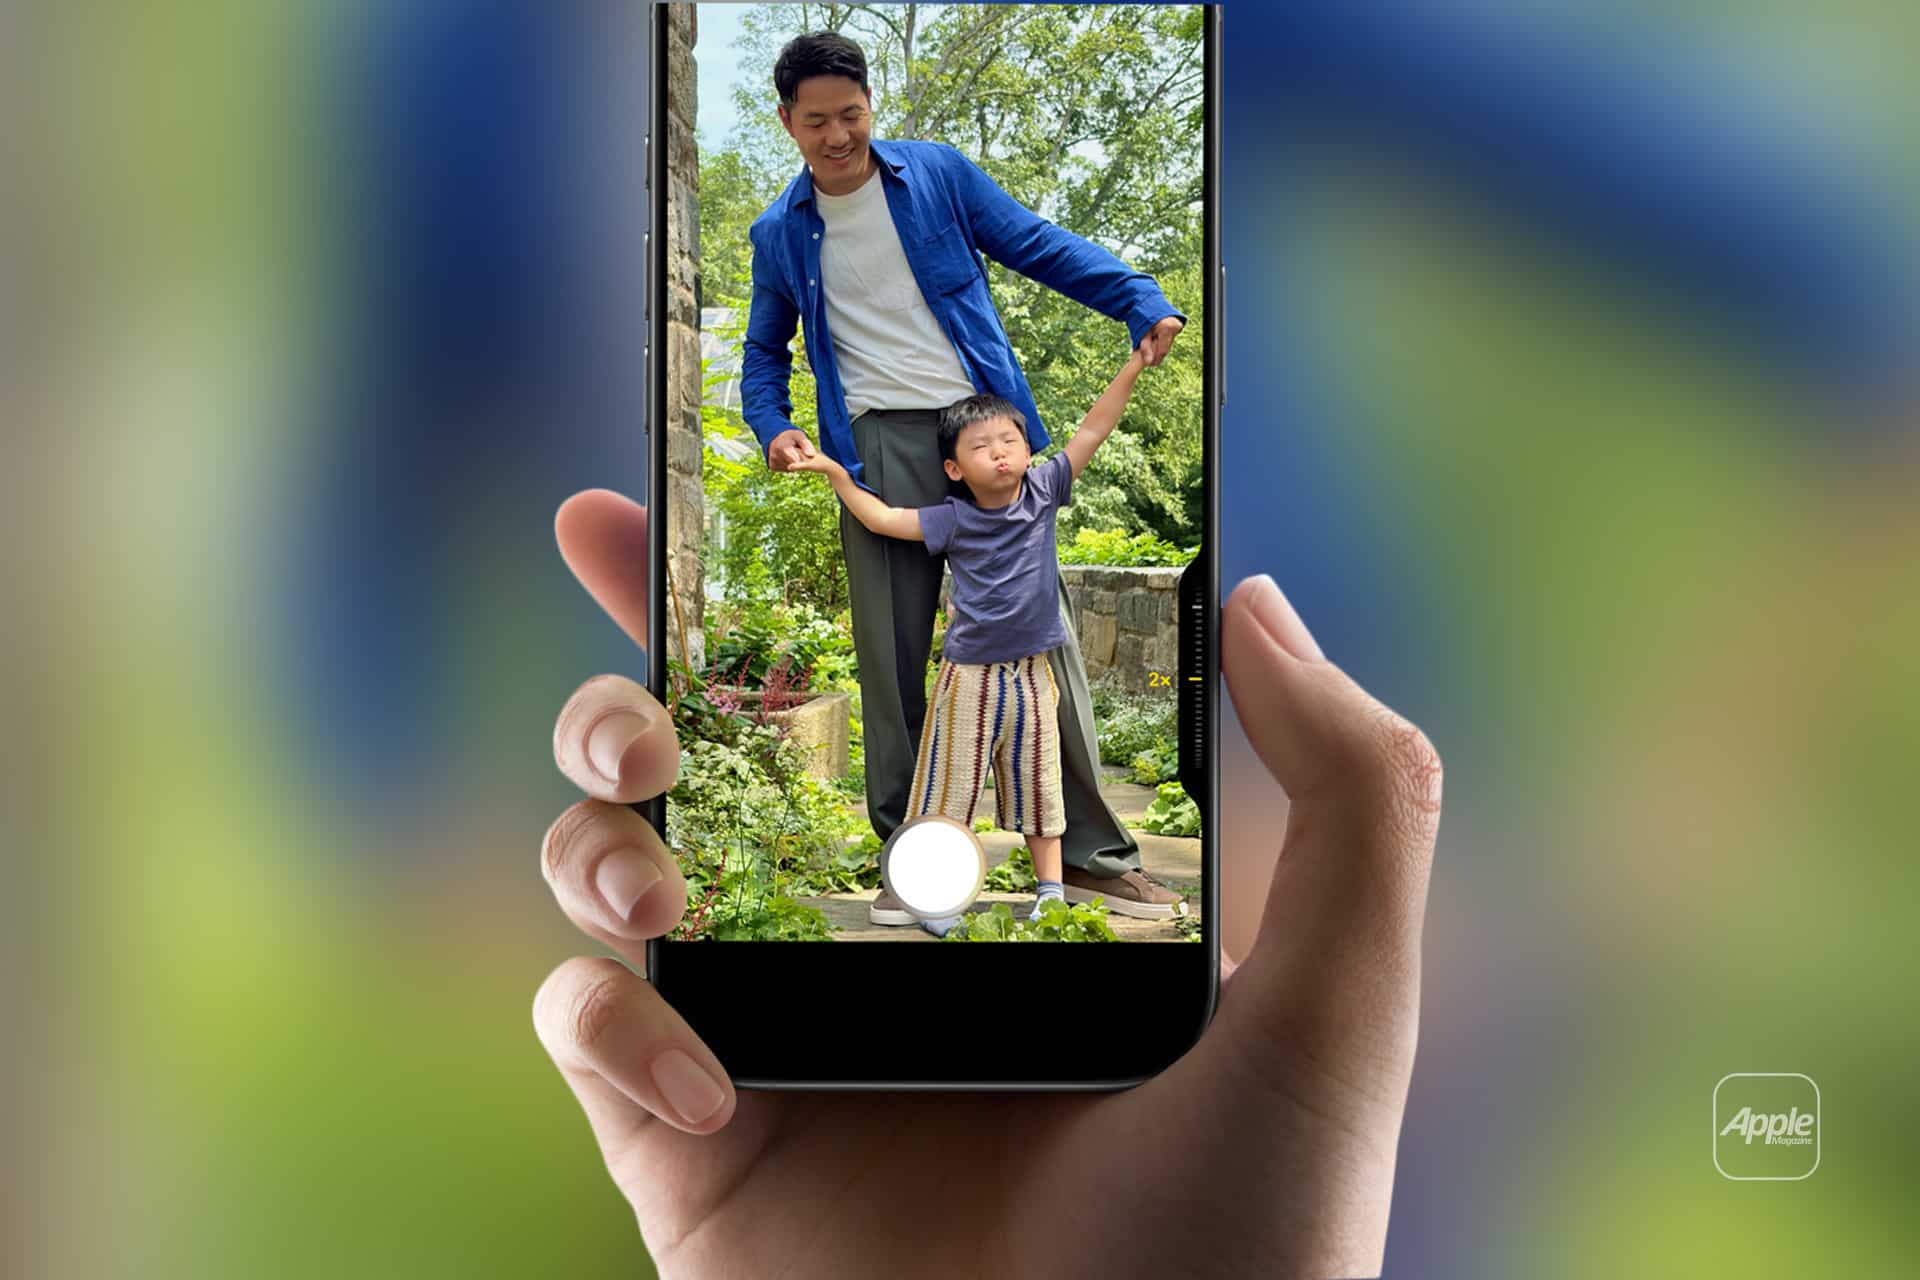
Begin with standard Video mode for most situations. In bright outdoor light or action, this mode captures steady footage with optical or sensor-shift stabilization that smoothes camera shake.

Cinematic Mode for Storytelling
Cinematic Mode simulates a shallow depth of field — similar to what you see in movies. The iPhone focuses on the subject while gently blurring the background, and it can shift focus as your subject moves.
Tap Cinematic in the Camera app > Frame your scene > Tap to focus on your subject
As you record, Cinematic Mode tracks faces and subjects automatically. You can also tap a new subject during recording to shift focus intentionally. In the Photos app, you can adjust the position of focus and depth after capture, which gives you creative flexibility in editing.
Everyday Practical: Capture a conversation between friends with Cinematic Mode to highlight the speaker and blur the rest of the room, making the moment feel more cinematic.
Mastering Slo-Mo and Time-Lapse
Slo-Mo turns moments into dramatic reveals. Use this when capturing fast action like sports, pets, or water splashes. iPhone usually defaults to 120 fps or 240 fps for Slo-Mo, offering smooth slow-motion playback.
Tap Slo-Mo > Record > Stop
Time-Lapse compresses long durations into quick clips. Set your iPhone steady — ideally on a tripod or stable surface — and press record. Time-Lapse captures for as long as you let it run and speeds the motion up automatically.
Tap Time-Lapse > Record > Stop
Practical Case: Capture a sunset with Time-Lapse. What takes minutes in real life becomes seconds of dynamic footage that shows light and color changing over time.
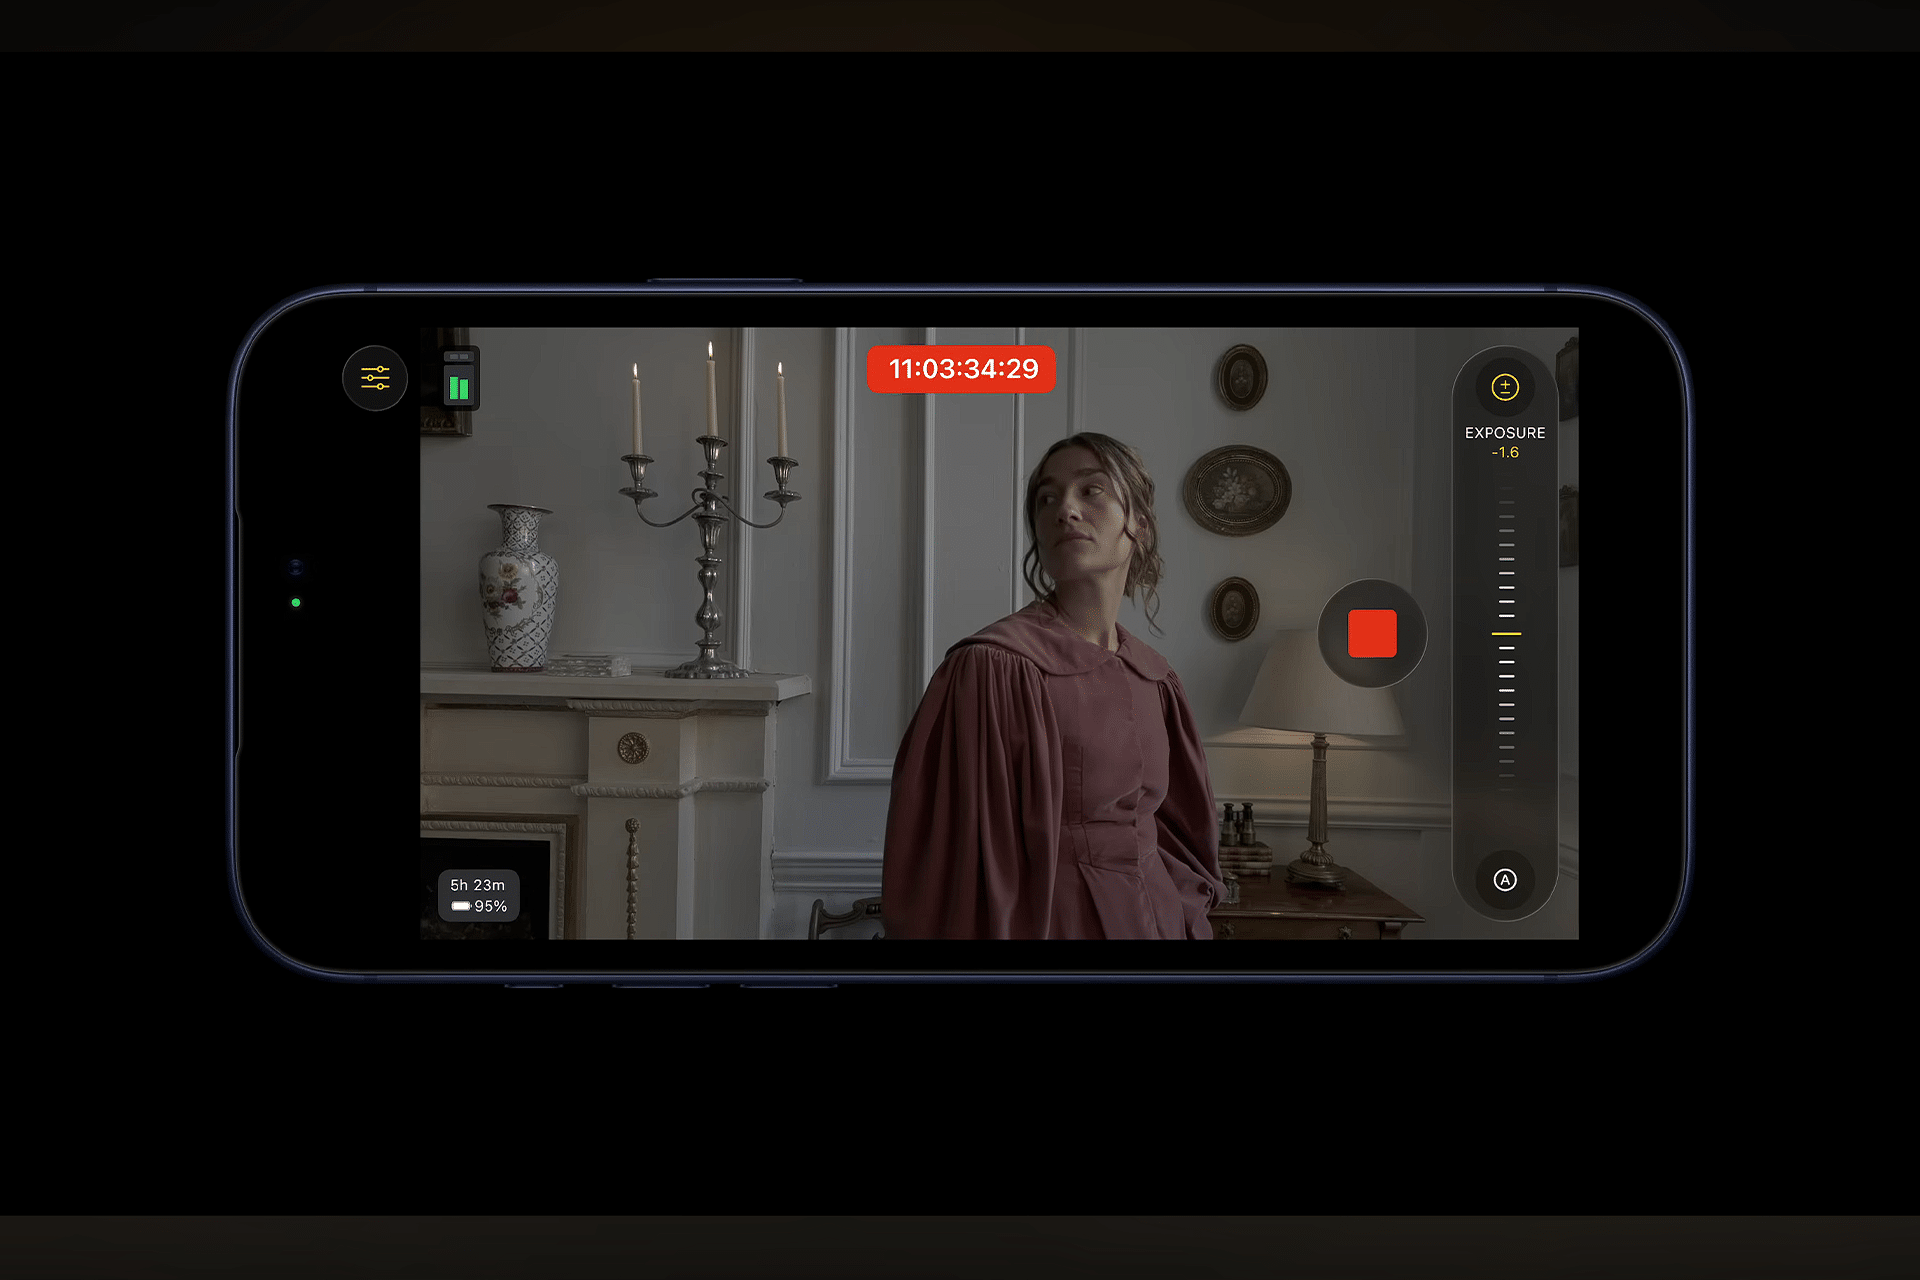
Focus and Exposure Control
While recording, you can lock focus and exposure for more consistent results:
Tap and hold on the screen > AE/AF Lock
Once locked, the iPhone won’t shift focus or brightness as you move. This is especially useful for controlled scenes like interviews or stable landscapes where sudden brightness changes would distract.
For creative control, tap to focus on the subject, then slide your finger up or down on the screen to adjust exposure (brightness) before you start filming.
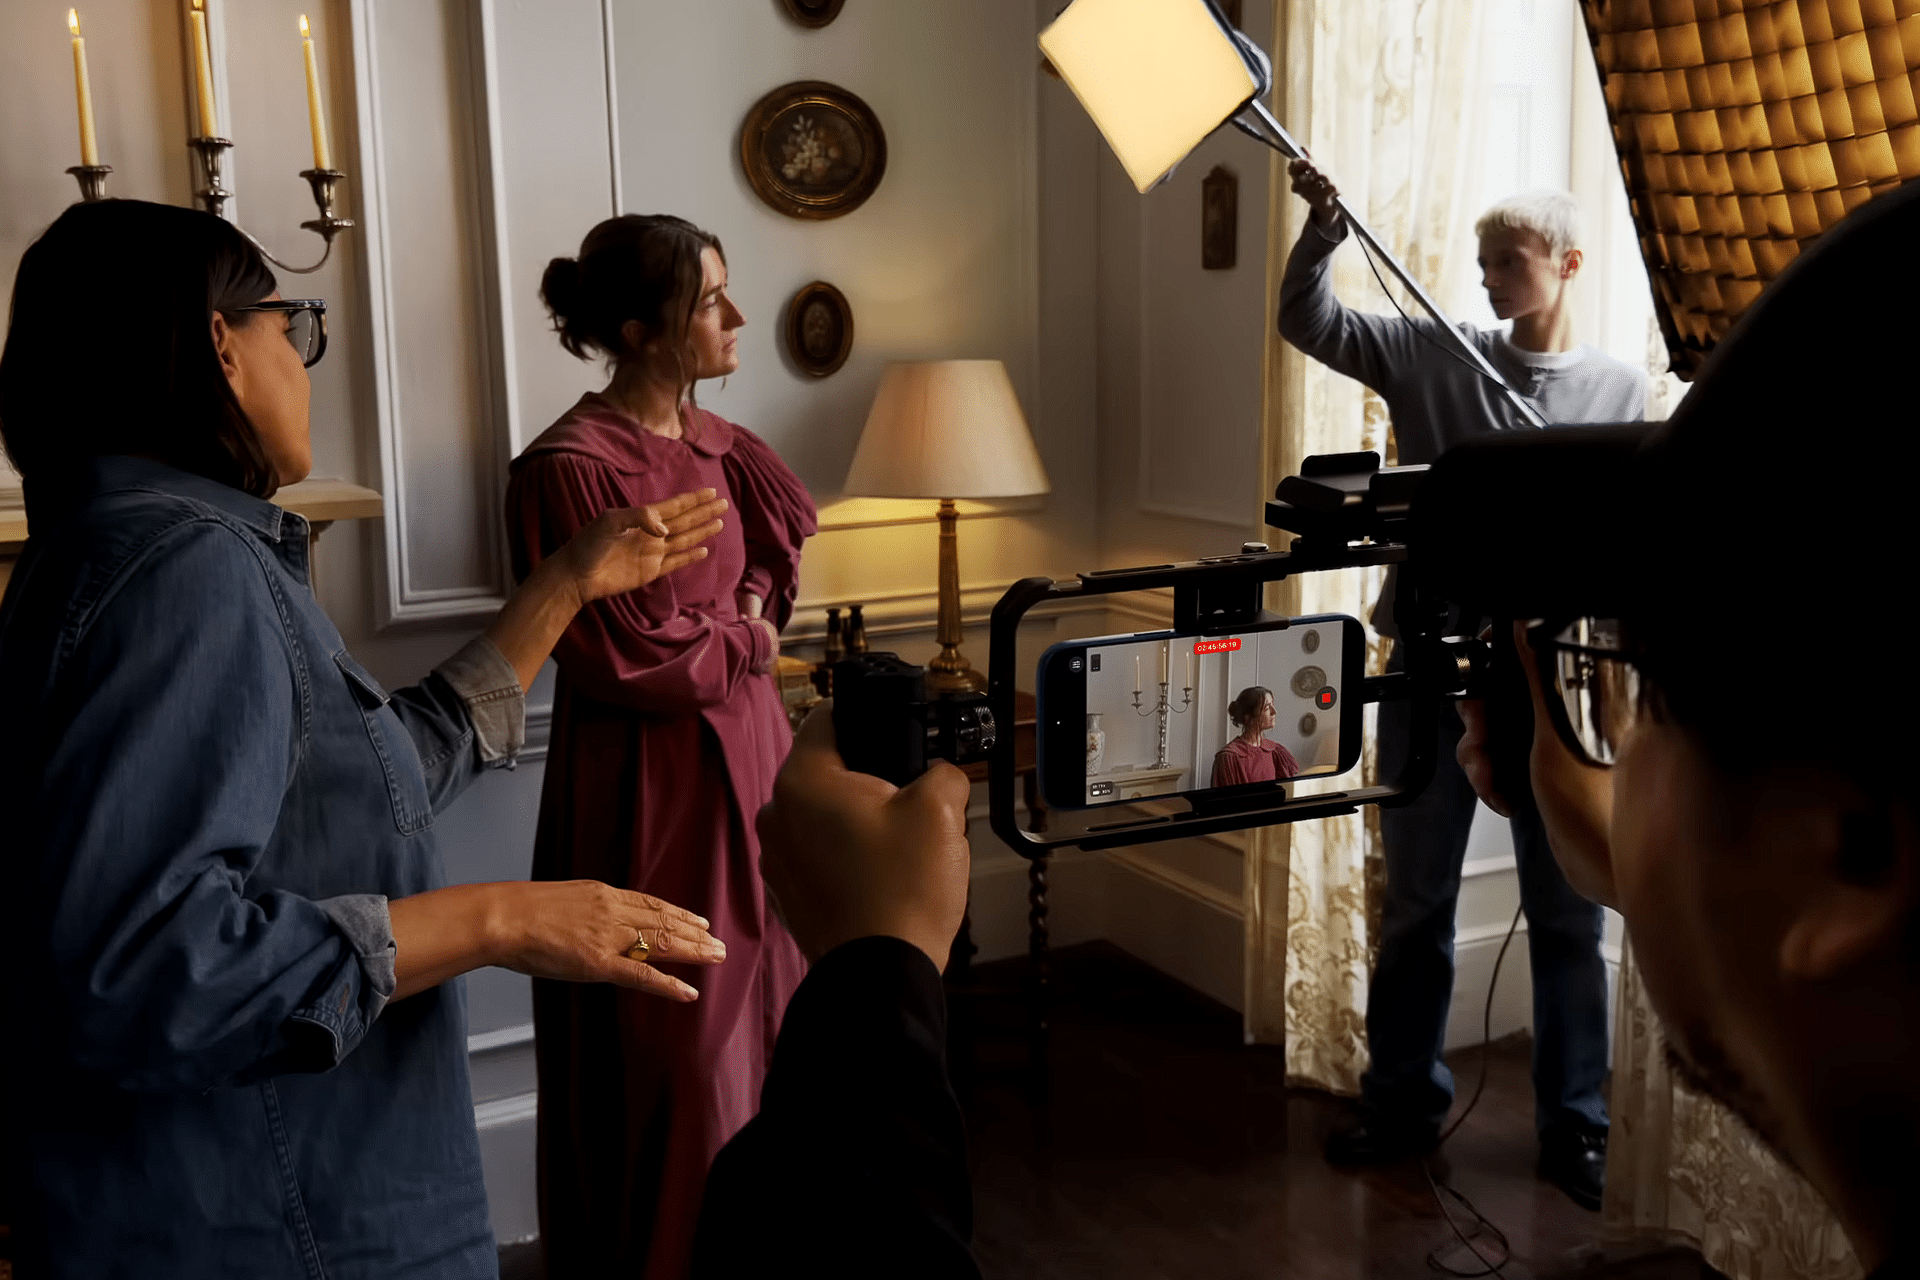
Stabilization and Movement
Keep motions smooth and visually pleasing by using stabilization. Most iPhones include optical or sensor-shift stabilization that actively reduces shake. Use a slight walking pace and keep your arms close to your body when shooting handheld. If possible, consider a gimbal or steady surface for very smooth footage.
Editing on iPhone After Capture
Once you’ve captured video, the built-in tools in the Photos app let you trim, crop, adjust colors, and even refine cinematic depth after the fact.
Photos > Select video > Edit
- Trim – Shorten the start and end points.
- Crop & Rotate – Change framing and orientation.
- Adjust – Brightness, color, contrast, and more.
- Cinematic depth – Adjust focus and blur after recording.
Practical Editing: After filming a walk in the park, use trim to remove dead space at the beginning and end, then adjust exposure to make colors pop.
Shooting Tips for Better Video
- Light Matters – Bright, even light yields crisp, detailed footage.
- Keep the Camera Steady – Move slowly and use two hands.
- Use Grid Lines – Align horizons and subjects.
- Think in Stories – Plan your clips like scenes in a movie.
Photosync and Sharing
Your videos sync through iCloud to all your devices, including iPad and Mac. Once synced, you can continue editing or share clips with family and friends via AirDrop or Messages.
Settings > Photos > iCloud Photos
This keeps your video library accessible and organized without manual transfers.
Your iPhone Is a Pocket Studio
The combination of smart hardware and intuitive software turns your iPhone into a versatile video camera. With practice, thoughtful framing, and understanding of key modes like Cinematic, Slo-Mo, and Time-Lapse, you can make videos that look intentional and compelling. The tools in iOS 26 help you capture and edit on the go, so every moment can become a polished memory or creative story.

