


The Files app, preinstalled on every iPad, provides a straightforward way to annotate PDFs without extra downloads. Its markup tools are simple yet effective, ideal for quick edits or casual note-taking. To get started, locate your PDF in the Files app, which can be stored locally or in cloud services like iCloud or Google Drive. Tap the PDF to open it, and you’ll see a marker tip icon in the upper-right corner of the screen. Tapping this icon activates the Markup toolbar, revealing a suite of tools including pens, highlighters, and text boxes.
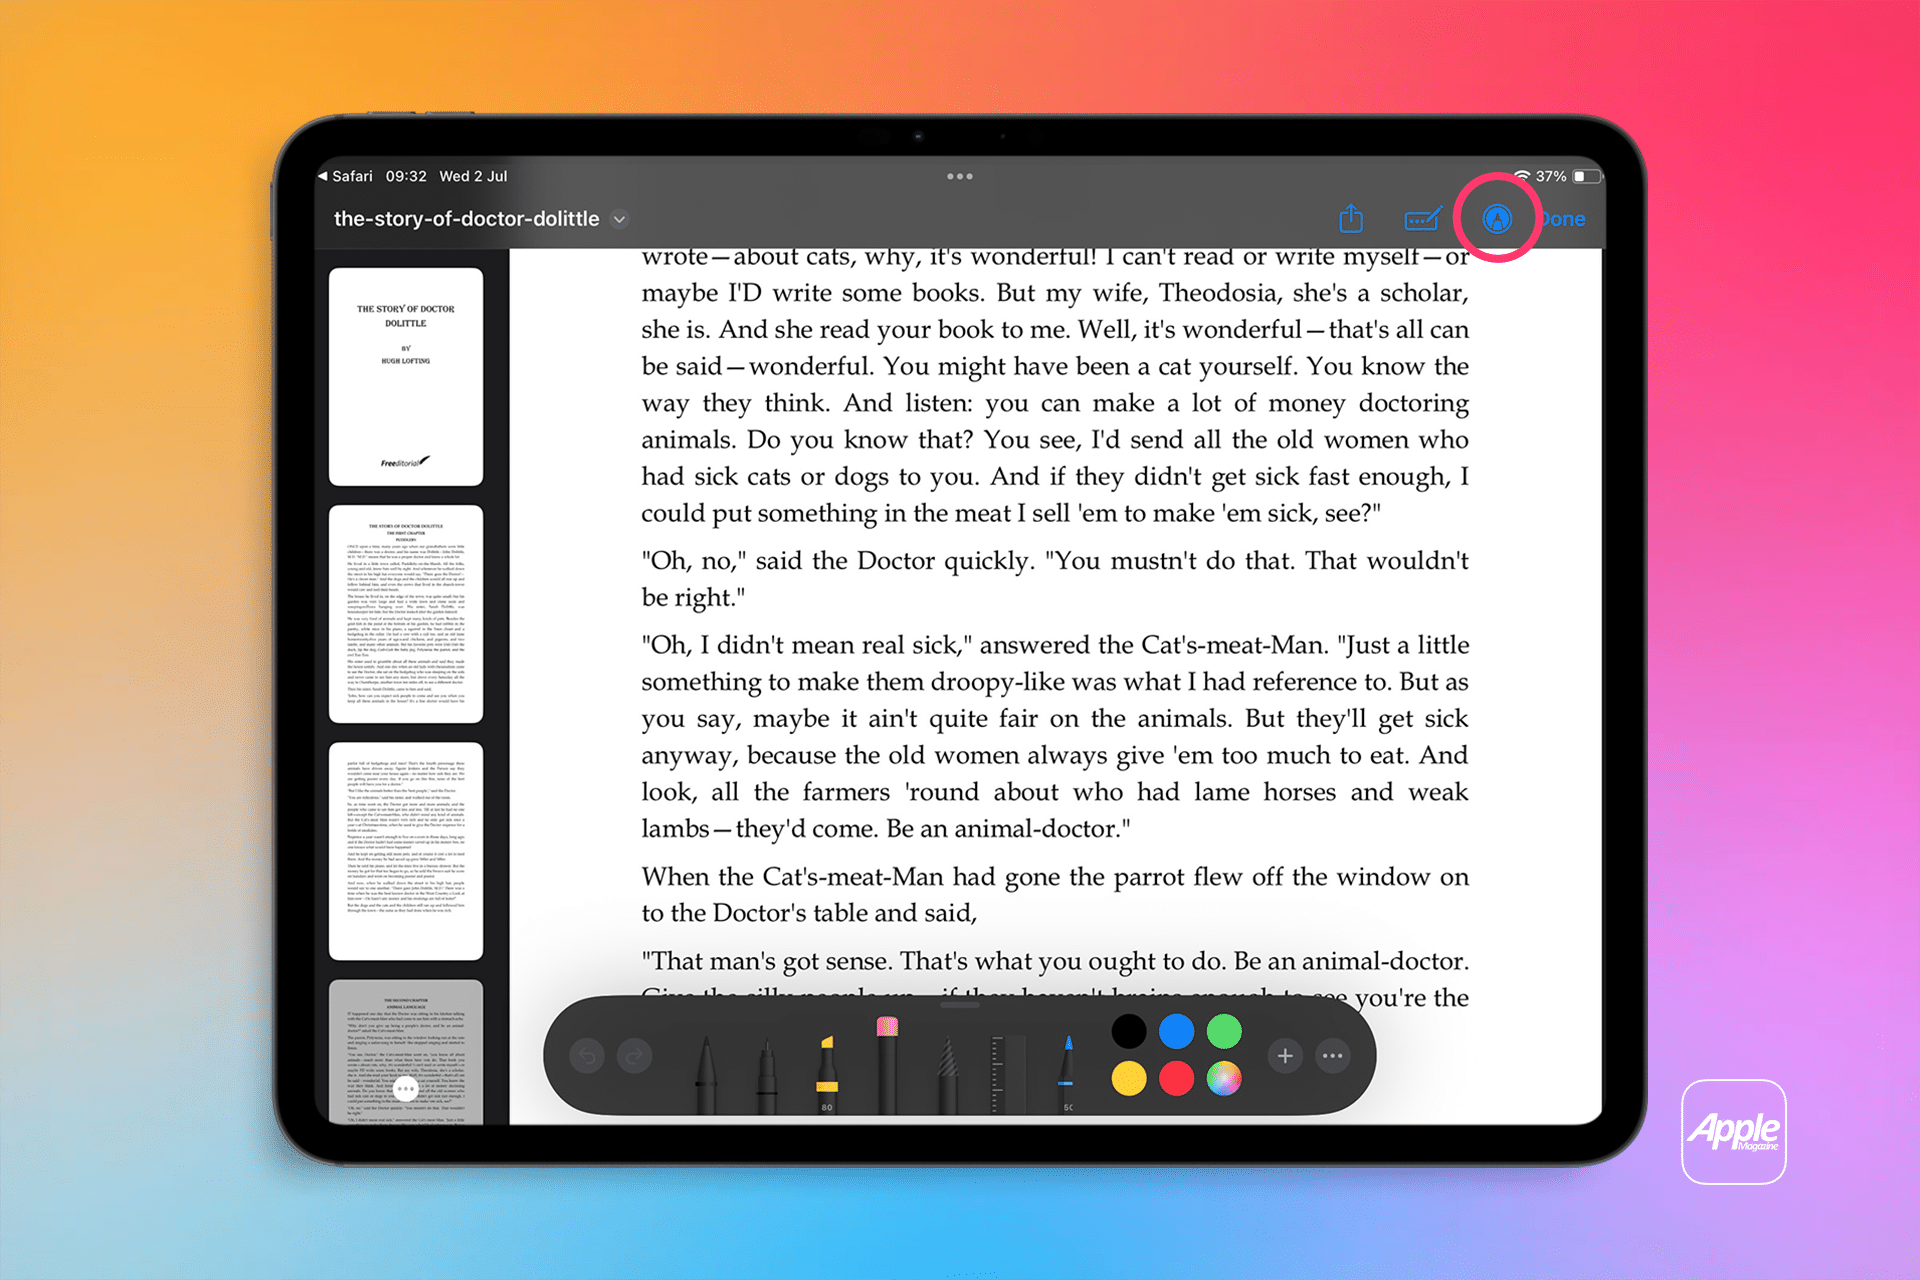
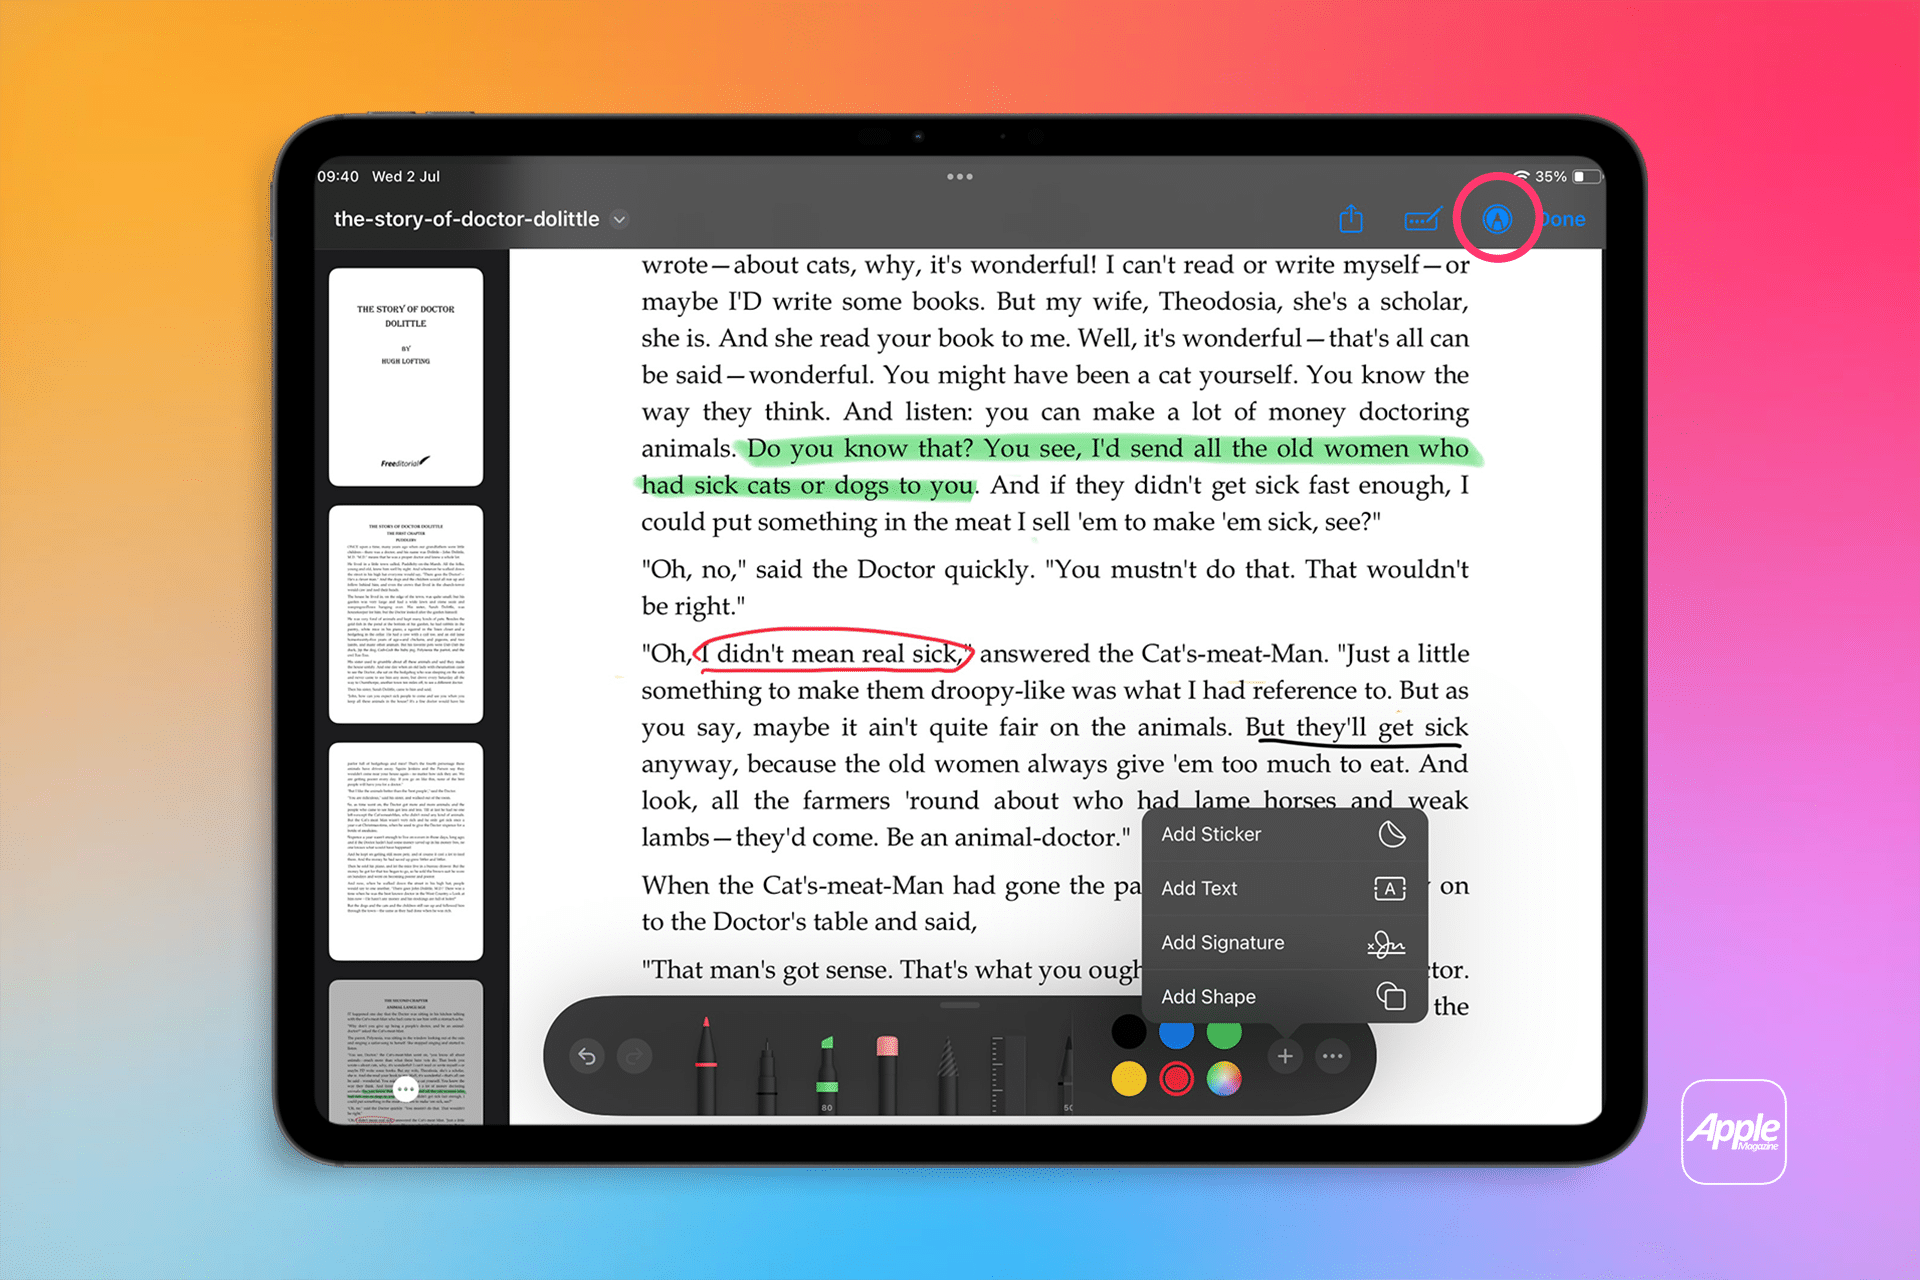
Select a tool, such as the highlighter, and drag your finger or Apple Pencil across the text to emphasize key sections. You can adjust the color, line thickness, or opacity by tapping the tool again, allowing for personalized annotations. For example, use a red pen to circle errors or a green highlighter to mark important passages. To add text, tap the plus (+) icon and select the text box option, then type your notes directly onto the document. Once finished, tap “Done” to save your changes automatically to the original file, ensuring your annotations are preserved.
Annotating PDFs in the Notes App
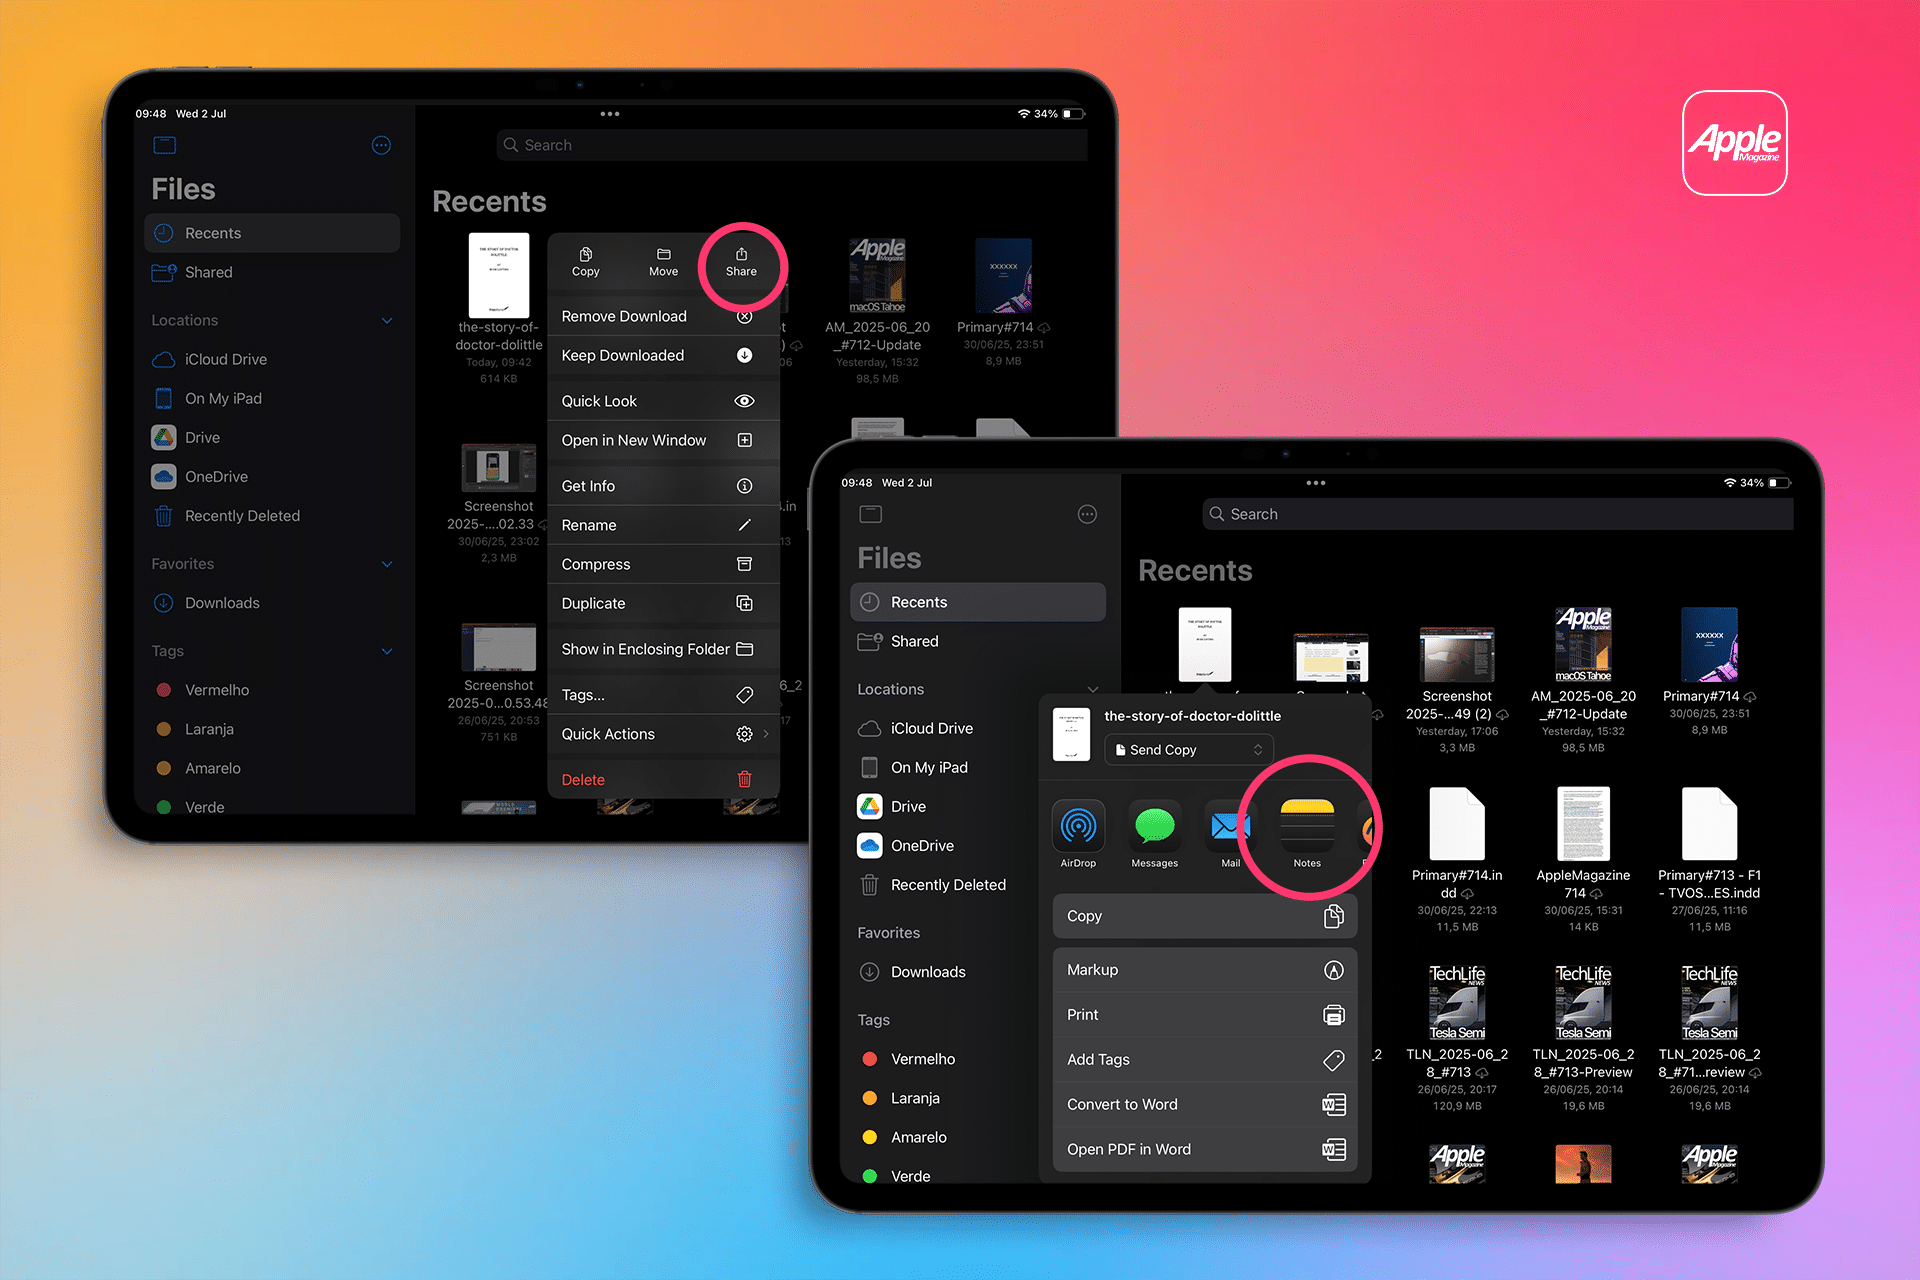
The Notes app offers a collaborative and versatile option for PDF annotation, especially for users working with others. To annotate a PDF in Notes, start by importing the file from another app, such as Files or Mail. Simply touch and hold the PDF, select “Share,” then choose “Notes” to add it to a new or existing note. Alternatively, drag the PDF directly into a note. Once in Notes, tap the PDF to open it, then tap the pen-like button to access the Markup toolbar.
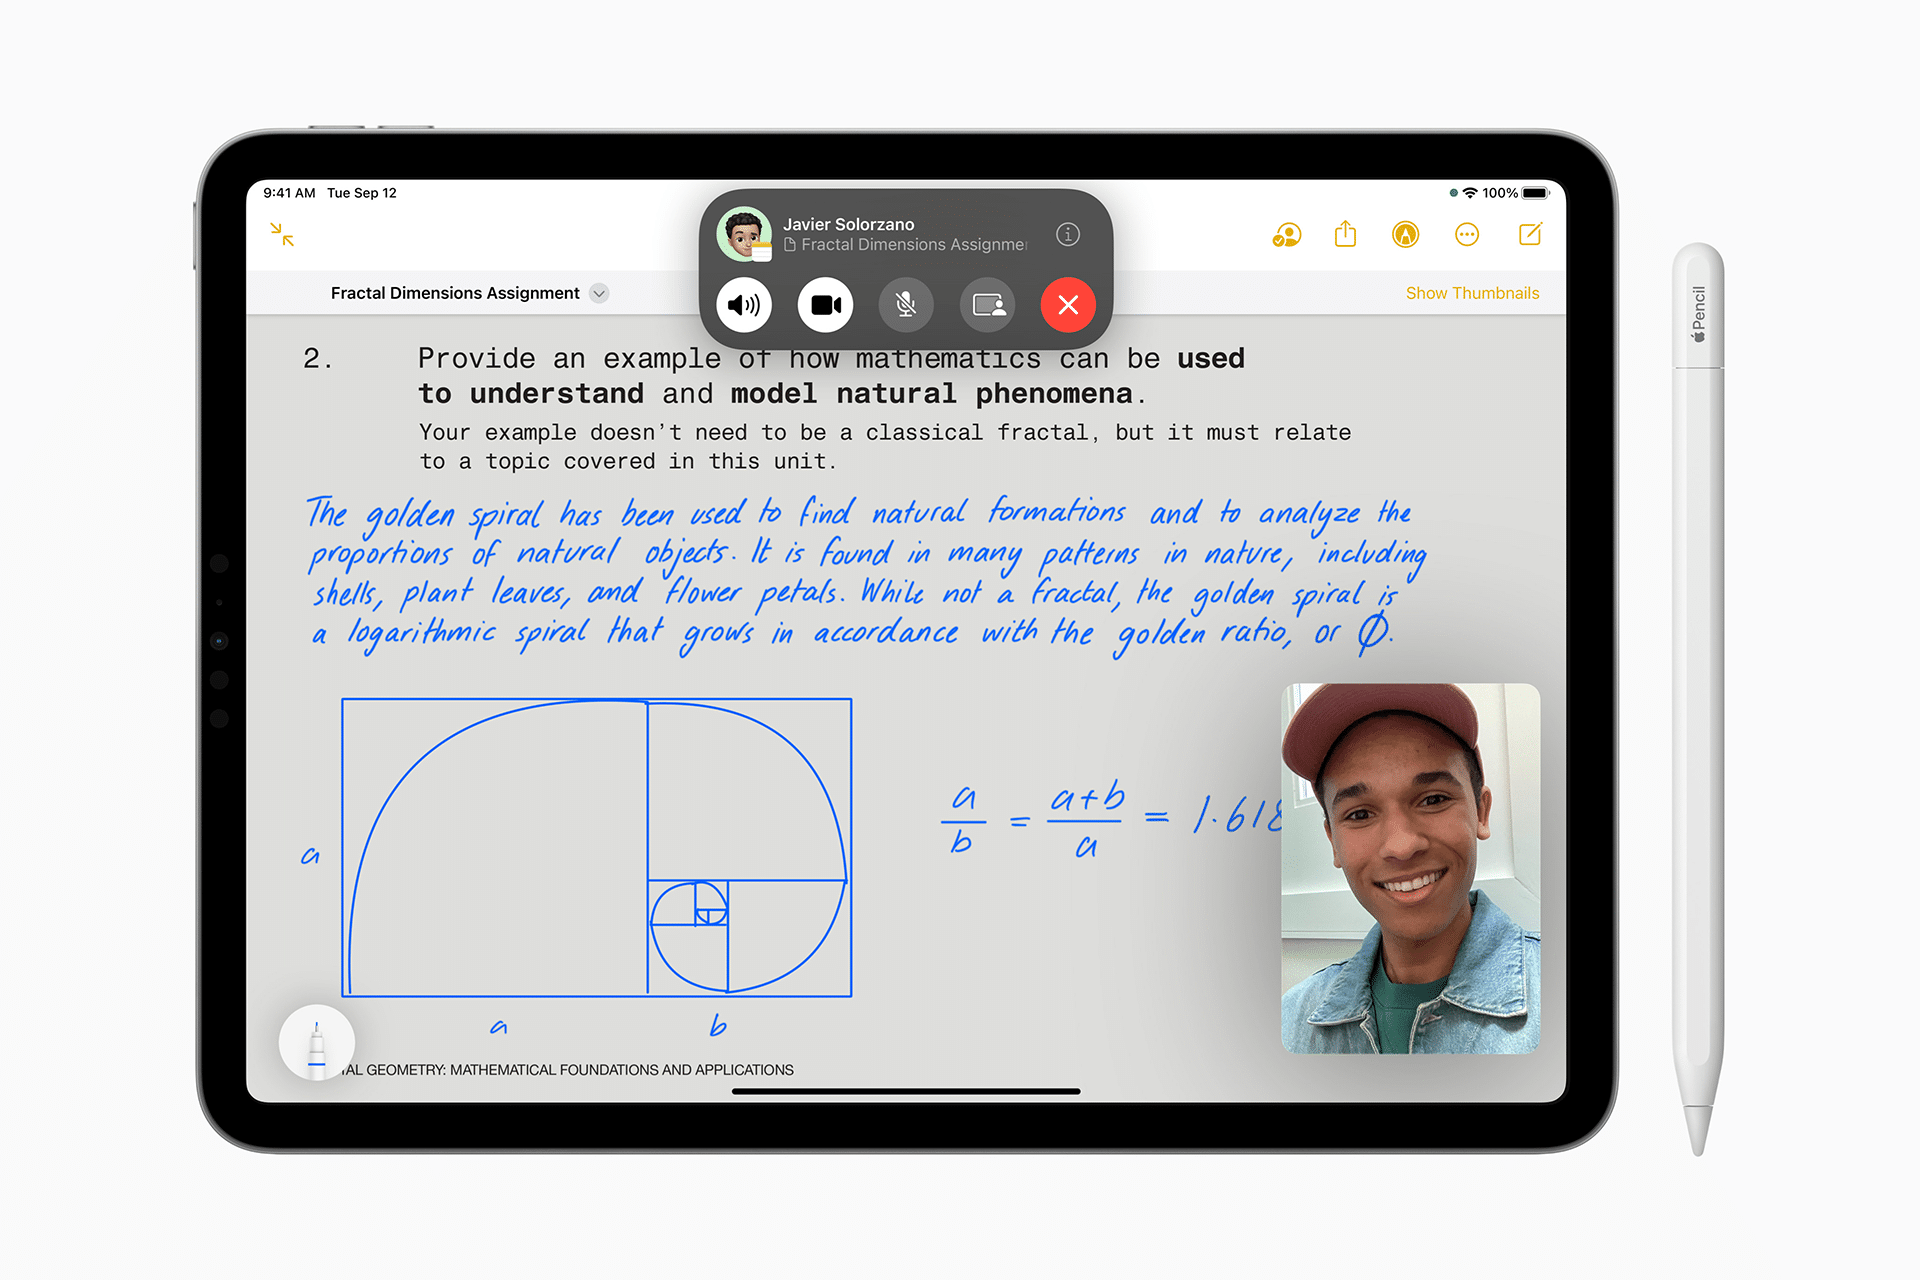
The Notes app supports a variety of annotation tools, including multiple pen styles, highlighters, and an eraser for correcting mistakes. With an Apple Pencil, you can write naturally, adding handwritten notes or sketches that anchor to specific parts of the PDF. This is particularly useful for students marking up lecture notes or professionals providing feedback on reports. The app also allows you to view the entire document at the top while adding comments below, streamlining navigation. When collaborating, you can share the note with others, enabling real-time feedback on the annotated PDF.
Leveraging Safari for Quick PDF Markups
Surprisingly, Safari, iPadOS’s default browser, doubles as a PDF annotation tool for files accessed online. If you encounter a PDF in Safari, such as a downloadable form or article, tap it to open, then select “View in Drive” to access it via iCloud. From there, tap the Markup button in the upper-right corner to reveal editing tools. You can highlight text, draw freehand, or add shapes like arrows to point out specific details. This method is particularly handy for one-off annotations, such as reviewing a contract or marking up a web-based study guide, though it’s less robust than dedicated apps for frequent use.
Tips for a Polished Annotation Workflow
To maximize your efficiency, consider using an Apple Pencil for precision, especially when drawing or writing freehand. Color-code your annotations—use one color for questions and another for key points—to keep your notes organized. Always save a backup of the original PDF before annotating to avoid accidental changes. If you need to remove annotations, most apps offer an eraser tool or an option to delete specific markups. For example, in the Files app, tap the eraser and select the annotation to remove it, or use the undo button for quick corrections.
For collaborative projects, the Notes app shines, allowing multiple users to view and edit annotations in a shared note. This is ideal for team reviews or study groups, where feedback needs to be consolidated in one place. If you’re working with large PDFs, adjust the viewing size in Notes (small, medium, or large) to balance readability and workspace. Additionally, explore shortcuts like double-tapping the Apple Pencil to switch tools, which can speed up your workflow.
Choosing the Right Tool for Your Needs
While iPadOS’s built-in apps—Files, Notes, and Safari—cover most annotation needs, their features are basic compared to third-party options like PDF Expert or Adobe Acrobat Reader. The Files app is best for quick, individual edits, while Notes excels in collaborative settings. Safari suits occasional markups of online PDFs. If you need advanced features like custom stamps or text editing, third-party apps may be worth exploring, but Apple’s native tools are free, accessible, and tightly integrated with iPadOS, making them a solid starting point.
Enhancing Productivity with Annotations
Annotating PDFs on iPadOS empowers users to transform documents into interactive tools for learning, collaboration, or professional work. Whether you’re a student highlighting textbooks, a professional reviewing contracts, or a creative sketching ideas, these built-in tools offer flexibility and ease. By mastering the Files, Notes, and Safari apps, you can streamline your workflow, making your iPad a powerful hub for productivity. Experiment with these tools to find the best fit for your needs, and elevate your PDF annotations to the next level.