Why Switch from Google Photos to iCloud?
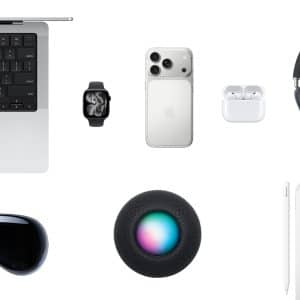
For those heavily invested in Apple’s products, iCloud Photos offers an unmatched level of integration. Photos and videos sync effortlessly across devices, whether you’re using an iPhone, iPad, or Mac. Your library stays organized and easily accessible through the Photos app, making it the natural choice for Apple users.
One of the significant advantages of iCloud is Apple’s focus on privacy. Your photos are stored securely with end-to-end encryption, and Apple’s commitment to data privacy means your content isn’t used for targeted ads or data profiling.
Before starting the migration, assess the size and structure of your Google Photos library. This step helps determine the storage plan you’ll need on iCloud. If your library is extensive, consider upgrading to an iCloud+ plan that offers sufficient storage, such as the 200GB or 2TB options.
To avoid compatibility issues, make sure your devices are running the latest versions of iOS, iPadOS, or macOS. The most recent updates come with enhancements that improve the performance and reliability of iCloud Photos.
How to Transfer Photos from Google Photos to iCloud
Step 1: Download Your Photos from Google Photos
To begin, you’ll need to download your entire Google Photos library. Google Takeout is the tool for this job. Visit the Google Takeout website, select “Google Photos,” and choose the file format and delivery method. The download process might take some time depending on the size of your library.
Step 2: Organize and Prepare Your Files
Once the download is complete, your photos will be organized into folders. Take this opportunity to review and organize your files, removing duplicates and ensuring everything is in order before uploading to iCloud.
Step 3: Upload Photos to iCloud
Now, you can start uploading your files to iCloud. On a Mac, open the Photos app, drag and drop the folders into your library, and the photos will begin syncing. If you’re using an iPhone or iPad, you can upload files through the Files app or directly through iCloud.com.
Optimizing iCloud Photos Settings
Enable iCloud Photos on All Devices
Ensure that iCloud Photos is enabled across all your devices for seamless syncing. Go to Settings > [Your Name] > iCloud > Photos and toggle on iCloud Photos. This setting will automatically sync any new photos or videos you take with your Apple devices.
Optimize Storage Settings
iCloud offers an “Optimize Storage” option, which is crucial if your device has limited storage. When enabled, full-resolution photos are stored in iCloud while smaller, optimized versions remain on your device. This keeps your local storage free without losing access to your entire library.
Shared Albums for Easy Collaboration
Take advantage of Shared Albums, which allow you to create shared photo albums with friends and family. This feature is particularly useful for events, trips, or collaborative projects, letting multiple people contribute photos and comments in one organized place.
One common challenge during migration is dealing with duplicate photos. Tools like Gemini Photos or built-in features in the Photos app can help you identify and remove duplicates, ensuring a clean library.
If you encounter syncing issues, check your Wi-Fi connection and ensure all devices are connected to the same Apple ID. Sometimes, large libraries take time to sync fully, so patience is key. If problems persist, restarting your devices or re-enabling iCloud Photos can resolve most issues.
Post-Migration Tips
Once the migration is complete, explore additional features included with iCloud+, such as Hide My Email, HomeKit Secure Video, and enhanced storage plans. These features add value beyond just photo storage, enhancing your overall Apple experience.
Backup Your Photos
Even with iCloud’s reliability, it’s always smart to maintain an additional backup. You can use external drives or third-party cloud services as a secondary backup, ensuring your memories are always protected.
Switching from Google Photos to iCloud Photos offers Apple users a more integrated and seamless experience. With better privacy, robust storage options, and smooth syncing across devices, iCloud Photos is the ideal solution for managing your photo library. By following these steps, your transition can be hassle-free, allowing you to fully enjoy the benefits of iCloud.


